South west Oklahoma is normally a 3 -6 week winter then you can pretty much count on warm days, usually around the first week or so of February, gradually getting warmer. What I would really like to know is WHAT HAPPENED this year! WOW We have had a REAL WINTER this year. Several occasions of snow that actually lasted longer then the normal 12 to 24 hours and COLD like the North country! Do not have TV or internet at the house so I have not really been able to keep up . From what little TV I see it looks like it was this way all over Wow!
In between that and getting hit with what ever monster bug has been going around I'm running at least 2 weeks behind of plans. Seriously I woke up on morning a couple of weeks ago feeling like I'd been hit by a truck. Headache from the deepest darkest part of you know where, could not think, could not talk intelligently in words of more then 2 syllables, could not walk straight the ten feet to the john or the door to let the dogs out. Seriously thought I had had a stroke at first but was to sick to go to the hospital. Dialing 911 was just to much effort. The good news is, I can actually think and chew gum at the same time and it is getting warm. 60's and 70's this week end and the keel is in the bail room ready to start putting resin on it. Got notarized copies of bill of sale and title and got those down to tag office so I will be legal once I get numbers and tag sticker on hull ( AFTER Fiberglass work is done.) .
Finally got around to unpacking the fiberglass order I put in a while back. Amazing thing, almost 400.00 worth of mostly tools and one 30 yard roll of cloth don't take up much room. Except for the cloth it is all on a couple of small shelves in the back room waiting for me to get busy. Did get the first layers of cloth for one side of the keel cut and ready to go. I am thinking tomorrow night I will get in there and start. Need to cut at least one more layer of cloth to fit then its resin, cloth, resin, chopped strand, resin and more cloth finished off with white pigmented resin for a finish. It may not look as professional as a shop but it will do the job which is all I really care about. Then once that side is done its is flip it and repeat on other side and I'm good on the keel. Next I really need to get the bottom rudder rebuilt. Plan on just starting from scratch on some sort of frame and glass it in. Have the tiller almost completely re-glued and ready to sand down to refinish. Need to go get some laminating resin or wood glue. I hate the idea of buying a quart of resin for such a small job so I may cheap out on that one.
Decided to spurge and go to outback, This was a major disappointment. Last time we went several years ago a rack of lamb was just that. Now it is 3 little lamb chops, some mashed potatoes and green beans covered in butter. can you say HIGH Cholesterol! It jut not worth the price or the trip any more.
Took some pics of keep and progress. Cant quite figure out where they are on this new cell phone. Will post once I do.
That's about all for now. Sail safe but get out there!
Showing posts with label fiberglass. Show all posts
Showing posts with label fiberglass. Show all posts
Thursday, February 13, 2014


Wednesday, July 25, 2012
Boats and 100 degee weather
Yesterday started out kind of slow. I have been wanting to get out to the Venture and fool around but life happens. I finally decided damned the temps full speed ahead! Mostly it has been moving things around.We have been using the boat to store some stuff in light of all the drama that was happening. Since I'm stuck here, with a house I can't sell, for a while any way, the decision has been made, as painful as it is, to move the stuff back inside and stick it in a corner some where and get back to what's important to me! If I can't sell this place for a while I'm darned sure going to get this boat ready and take it ANY PLACE that will sustain sailing even if it is Lake Texhoma or one of the area lakes for the duration!
Having said that! Well it was still a good day. I got outside and in the boat. I started out right after sunset. When I finally looked at the clock, it was about 82 degrees F according to weatherbug at 3:16 AM. . The good thing about the houses immediately around me being empty is the misc noises I make fooling around late at night are not a problem as if my neighbors were really close. Now I can't exactly start up a drill or a power saw but little noises like dropping a hammer or climbing in and out of the boat are not going to give any one a sleepless night. Not having to worry about my trouble light shining into any ones bedroom window makes it nice. It's how I plan to beat the heat for the not so noisy parts any way.
Tried to pull the chain plates off. It's not happening with only one person. Have to have someone man a screw driver on the out side while I pull off nuts on the inside. Did get the measurements for backing plates. I figure to get some 3: x 3/16 inch . I'm figuring 6 feet should be enough to get that part done. Throw another 2 ft of 1/4 inch for new chain plates and I should be good. Am going to get new bolts, nuts etc so all the metals match . That and some bytal tape (spelling) and I'm good to go. I have been toying with how to do this. The voc tech school here has a class that operates a hug computer operated metal cutting machine . You see where that is going, right? Have to wait til it opens but what the heck I'm here any way may as well make the best of it. If that don't work I'll get the Dremel out and do it my self. I looked up sources for the metal . WOW can you say EXPENSIVE! If any one has a source for 316 Stainless 3/ 16" x 2" or 3/ 16 x 4",at a decent price PLEASE post it or send me an email!
Have been playing around with the idea of going ahead and saving up for the solar panel to get the wiring started, Have to get a wiring plan figured out. Its only a 22 ft boat so I'm figuring rough eye balling it , the longest run I should have is maybe 16 ft, not counting mast of course. I've got enough block to raise this gal up and drop the keel, so that is on the agenda s a definite.
Where is all this going?
The baby boy has LEFT THE BUILDING! Now that the set back is almost over, once again I am free at last! Momma's days of being Momma on a full time in house basis are OVER! We had a minor setback this last three weeks but things are getting back on track! I honestly cannot decide who this pushing your fledgling out of the nest is harder on. Yeah, at 28, since the medical issues are resolved, its time for him to be on his own. NO DOUBT about that.
What I do not get is why, once they are "on their own", when your child steps into the "goo" and ask for your help, do they seem to think that this willingness to help them sort it out, as in think it through to THEM finding a conclusion and or solution THEY CAN DO, means in THEIR OPINION, you and your assets are on call 24/ 7 all of a sudden, as if they were three again? OK, I get that it takes time for them to adjust to a new life of living on their own.. That's just a case of they have to get experience and there is only one way to get that. What I do not understand is why it suddenly becomes (in their opinion) your crisis? Can you say OY!
Parents teach your children how to plan! Make sure they have coping skills for really bad days! Teach them that THEIR LACK OF PLANNING IS NOT YOUR CRISIS! My son understands what caused the problem. He was taught the skills to cope with adversity. Some things only come with getting knocked down and pulling your self back up. This was one of those. Time will tell how long it takes for all that stuff we tell our children that they did not want to hear takes root and gets solid. The good news is at 28 he only has about a year and a half before that second coming of age that seems to kick in at 30 starts to take effect.
The good news is he has a really good distraction so now mother won't be the single most important women in his life. He found Ms. Right! I got to spend sometime getting to know her. She is a trooper! She will definitely do to ride the river with . She in not a wimp by any means. We have been talking about what I'm planing on doing with my life . At first all kinds of bad experiences were really making her anti boats. Now you KNOW that aint going to work very long around me, right? We had some talks .She seems to be slowly coming around,. Last night she informed me that being afraid of boats, sailing etc over what happened in her childhood was not sometime she was going to allow to continue,. The girl has MOXY There are very few things that make me want to climb up into someones face but, oh by howdy! I'll not go into the details as it is not my story to tell, but I would so love to keel haul or at least,put a extraordinarily large knot on someones head after hearing about the DUMB STUNT that some so called adults played on some children!.
The GREAT news is this gal is the one that has him inspired to do all that stuff men are supposed to do. Who would have thunk it! LOL
I must have done sometime right. My other son informs me he also has started a relationship with his Ms. Right. She also sounds like a trooper and a basically well grounded gal. RELIEF! Who knows maybe grand children are on the horizon? Time will tell.
well I guess that's it for now. Think I'm going to go get my tools out and ready for later when the sun goes down. I have some hardware to pull off a boat.
Sail safe but sail!
Having said that! Well it was still a good day. I got outside and in the boat. I started out right after sunset. When I finally looked at the clock, it was about 82 degrees F according to weatherbug at 3:16 AM. . The good thing about the houses immediately around me being empty is the misc noises I make fooling around late at night are not a problem as if my neighbors were really close. Now I can't exactly start up a drill or a power saw but little noises like dropping a hammer or climbing in and out of the boat are not going to give any one a sleepless night. Not having to worry about my trouble light shining into any ones bedroom window makes it nice. It's how I plan to beat the heat for the not so noisy parts any way.
Tried to pull the chain plates off. It's not happening with only one person. Have to have someone man a screw driver on the out side while I pull off nuts on the inside. Did get the measurements for backing plates. I figure to get some 3: x 3/16 inch . I'm figuring 6 feet should be enough to get that part done. Throw another 2 ft of 1/4 inch for new chain plates and I should be good. Am going to get new bolts, nuts etc so all the metals match . That and some bytal tape (spelling) and I'm good to go. I have been toying with how to do this. The voc tech school here has a class that operates a hug computer operated metal cutting machine . You see where that is going, right? Have to wait til it opens but what the heck I'm here any way may as well make the best of it. If that don't work I'll get the Dremel out and do it my self. I looked up sources for the metal . WOW can you say EXPENSIVE! If any one has a source for 316 Stainless 3/ 16" x 2" or 3/ 16 x 4",at a decent price PLEASE post it or send me an email!
Have been playing around with the idea of going ahead and saving up for the solar panel to get the wiring started, Have to get a wiring plan figured out. Its only a 22 ft boat so I'm figuring rough eye balling it , the longest run I should have is maybe 16 ft, not counting mast of course. I've got enough block to raise this gal up and drop the keel, so that is on the agenda s a definite.
Where is all this going?
The baby boy has LEFT THE BUILDING! Now that the set back is almost over, once again I am free at last! Momma's days of being Momma on a full time in house basis are OVER! We had a minor setback this last three weeks but things are getting back on track! I honestly cannot decide who this pushing your fledgling out of the nest is harder on. Yeah, at 28, since the medical issues are resolved, its time for him to be on his own. NO DOUBT about that.
What I do not get is why, once they are "on their own", when your child steps into the "goo" and ask for your help, do they seem to think that this willingness to help them sort it out, as in think it through to THEM finding a conclusion and or solution THEY CAN DO, means in THEIR OPINION, you and your assets are on call 24/ 7 all of a sudden, as if they were three again? OK, I get that it takes time for them to adjust to a new life of living on their own.. That's just a case of they have to get experience and there is only one way to get that. What I do not understand is why it suddenly becomes (in their opinion) your crisis? Can you say OY!
Parents teach your children how to plan! Make sure they have coping skills for really bad days! Teach them that THEIR LACK OF PLANNING IS NOT YOUR CRISIS! My son understands what caused the problem. He was taught the skills to cope with adversity. Some things only come with getting knocked down and pulling your self back up. This was one of those. Time will tell how long it takes for all that stuff we tell our children that they did not want to hear takes root and gets solid. The good news is at 28 he only has about a year and a half before that second coming of age that seems to kick in at 30 starts to take effect.
The good news is he has a really good distraction so now mother won't be the single most important women in his life. He found Ms. Right! I got to spend sometime getting to know her. She is a trooper! She will definitely do to ride the river with . She in not a wimp by any means. We have been talking about what I'm planing on doing with my life . At first all kinds of bad experiences were really making her anti boats. Now you KNOW that aint going to work very long around me, right? We had some talks .She seems to be slowly coming around,. Last night she informed me that being afraid of boats, sailing etc over what happened in her childhood was not sometime she was going to allow to continue,. The girl has MOXY There are very few things that make me want to climb up into someones face but, oh by howdy! I'll not go into the details as it is not my story to tell, but I would so love to keel haul or at least,put a extraordinarily large knot on someones head after hearing about the DUMB STUNT that some so called adults played on some children!.
The GREAT news is this gal is the one that has him inspired to do all that stuff men are supposed to do. Who would have thunk it! LOL
I must have done sometime right. My other son informs me he also has started a relationship with his Ms. Right. She also sounds like a trooper and a basically well grounded gal. RELIEF! Who knows maybe grand children are on the horizon? Time will tell.
well I guess that's it for now. Think I'm going to go get my tools out and ready for later when the sun goes down. I have some hardware to pull off a boat.
Sail safe but sail!
Thursday, November 3, 2011
Polyester, Woood and Wood Stoves.

On this page I am making the pics larger then normal to show detail. I'm not sure if it will make it upload a lot slower and be a pain for viewers. Please , feedback on this would really be appreciated! Thanks.
Poly trimming was good practice for using the Dremel I used the EZ lock cutting blade and was very pleasantly surprised how it did and how long it lasted.
Resin I am using for this part of project

The resin container says it is water proof. This is their general all purpose house hold use bondo. The little tube is the hardener that came with it. The small bottle is what I bought at Oreillys. The mixing bowl I got from Oreillys. I really like them, They cleanup really well with an acetone soaked rag and if you look a the photo below you can see it has multiple markings for different types of resin. Not bad for less then a buck
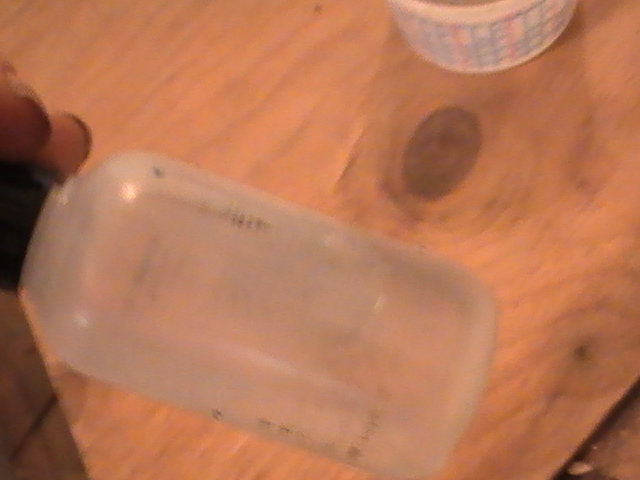 |
| It originally has Bondo liquid hardener written on it but the lettering came off as I used it due to sticky hands from resin. |

If you remember what I had after the poly cured was a real mess around the edges from having the plastic I used underneath.
 |
| Front |
 |
| Back |
Some close ups of the mess on V berth tip board.


Shots of the trim job in process
I forgot about taking shots before I started this but you can still get the general idea. I started by just taking it off a little bit at a time with scissors. Probably not a great idea but it got the largest part of it off. .If I had to do it all over again, I would use the Dremel for this part.
 |
| You can see where the resin from both sides overflowed the board. |
 |
| I now know how to make ice cycles out of resin. |
 |
| The back of the first board I did No plastic under the board.. |


 |
| the resin sealed the edges really well in various places. It seemed a pity to cut it off but it had to happen to fit. |


 |
| Front |
 |
| Back |
 |
| See the void? |
 |
| Separation of cloth due to plastic moving things around so I could not keep the cloth in place. Next time I think I will use staples to keep cloth in place. |
Time to use the Dremel.
 |
| First we take off the biggest part, making sure we leave enough room to not gouge the wood. |

Close ups of what we have left


On to the porta pottie board.


 |
| Ready for final sanding to pretreat top side. |


My Blue heeler standing by to make sure I get it right.
I still have to sand the excess poly off the front as that looks really tacky and has to be done before I pre treat for poly on the top sides but one step at a time I'm getting it done.

 |
| Looking GOOD!!!!!!!!!!!!! |

Even that first board I did for the porta pottie looks decent on the edges now that it is trimmed up.
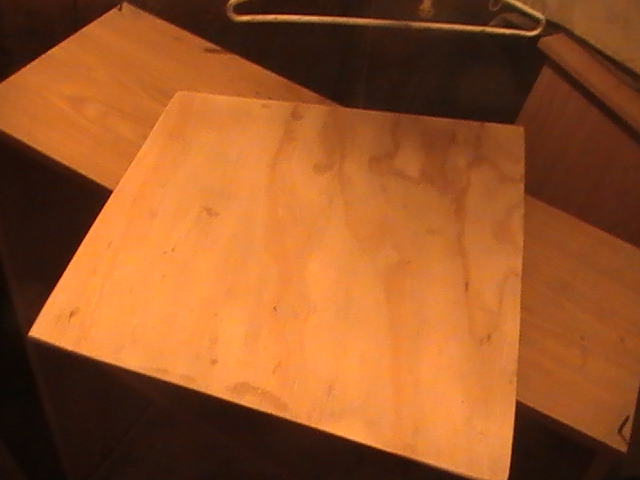


I got busy with starting the job of trimming up the wood for the bulkhead between the bow flotation and the new storage space. Am using the wood that was in the middle section. It is a tad to short across the beam but I can use a board stretcher made out of the other piece to fill in the gaps. I HATE throwing perfectly good wood away, Once it is in place and fiber glassed, it will be fine. For those if you that do not know what a board stretcher is, it is simply adding extra pieces where it is to short.
See the weave
These are close up shots of the first board I polyed. I did not know about pre treating it. You can see the weave of the cloth which as I understand it is a bad thing. Even I can tell this is not a good thing when compared to the board I pretreated with the diluted poly. This board, if put under water for a sustained period of time, I do not doubt for a minute would have severe delamination and form blisters.
This is I suspect why so may are down on using poly based resin for boat repair. When it comes to the hull or rudder, there is no way I would use polyester based resin. But for my purposes of interior it should be fine. Heaven forbid me ever being proven right about this by my boat being underwater! The board I pre treated with the diluted poly s does NOT have this problem.


V Berth Storage Bulkhead

I was truly surprised how long that one cutter lasted. I started out with trying to use my sons battery operated circular saw. The blade is getting really dull and the batteries are needing replaced, so I changed over to the EZ lock on my Dremel. I finished the second slant cut with it, did all the trimming on the two v berth pieces and got one of the hull notches done before I needed to change blades. Not to bad IMHO for one blade. It was burning the wood instead of cutting it by the time I got to the second notch.
That's all for now on the boat.
We finally got the wood stove ready. It was covered up out side but still got rusted. I guess metal absorbs moisture even if it is covered really well. Any way to make along story short we had a mess. It got rusted and I was NOT going to put it back in the house looking like that. I went out to Ace hardware to get some primer and stove paint.

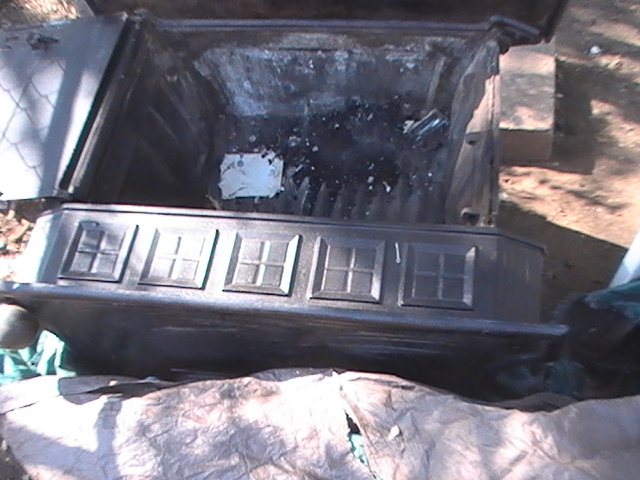
While I was there John ( manager) reminded me about rust converters. He showed me a product but I did not like the idea of it turning a gray or white color. I noticed a little bottle of Rustoleum Rust reformer sitting up stop shelf so even at 8 dollars plus for a 8 oz bottle I bought it since it turned the rust black, which was more in line with what I had seen on you tube videos about another product. Plus I figured if it went well I would not have to repaint. I was not looking forward to having to have the guys brush all that rust off, sand it level and then prime and repaint that stove. Long story short, it took a couple of coats to do it. On some really bad spots we used three and four coats but it looks pretty good, even if I do say so myself. It is a more rustic look then if we had sanded it and painted it but that is OK. I don't think any one but me is going to care about that. I do want to put a light coat of paint over it later so it matches the stove pipe better . We sprayed the chrome pipe so it matches . One thing I do need to mention if you use the rust converter or paint on a stove MAKE REAL SURE YOU BURN IT WITH A REALLY GOOD SOLID STRONG HOT FIRE BEFORE YOU PUT IT IN HOUSE! That first fire is going to stink so bad it will drive you out of the House! PLEASE TRUST ME ON THIS! WE PUT A PAPER FIRE IN IT THINKING THAT WOULD DO. I WAS SO WRONG!!!!
It ended up taking the best part of 2 bottles but it was worth it in just the work saved of not having to brush, sand, prime and paint the stove.
Shots of in progress stove rust conversion to show the color after rust conversion.
 |
| Not to shabby |
 |
| Looking good and working just fine!!!!!!!!! |
I finally got around to ordering the parts for the Lumina. 100 bucks USD but what are you gonna do? It has to be done. We basically are replacing the entire coolant over flow system.
I can't believe how much they want for new tires for this van! It is outrageous! 500.00 for tires? I'm having my son go check out the salvage yards. Same issue for the boat trailer and little trailer.
One thing at a time it will get done.
The house is getting really close to being done. Have a lot of little stuff still to do then we are good to go.
That's all for now. Sail safe but sail
And never forget to USE DA GREY MATTER
Monday, October 31, 2011
Polyester and Wood
All over the Internet I see people really putting down using polyester resin for different projects. Now granted the expensive epoxy may be better, I would not know, I have never used it. If I ever build my own wooden boat, Id probably use the 2 part epoxy just because it is supposed to be better wetting . What I do know is after a LOT of research I found something that I'm really happy with for the current application.
It started out with the platform under the porta pottie being in really UGLY condition. I took it out ( previous post) and put cloth and one straight coat of poly on the bottom side. It looks terrible. NO one but me is ever going to see it , so for a newbie project where I'm experimenting I think it will be OK. It not like it is going to be intentionally immersed. What was there originally only had paint on it so anything is an improvement.
include photo here of pottie support
Rearranging the flotation foam in the v berth and turning part of that space into storage meant taking the wood off of the V berth. I used the original wood to make my pattern . Again since I'm just learning this, I started with the under side of the tip of the wood.

All things considered, it does not look to terribly bad for a rank beginner. It has a spot that I honestly have no idea why but it points up like a pin. I have this notion that a bug flew onto it and left that point when it flew off. The poly must have been really close to dry since it is still here and the bug or what ever it was did not stick. You can't see any of the cloth in it except for a few spots around the edge so I think I must have done alright. Much better then not pre-coating it,. That has places all over you can see the weave of the cloth.
I diluted the poly down with acetone. I used a 4:1 mix, then a 2:1 mix then a 1.5: 1 mix. My hand slipped on the last one. Then I did the straight poly coat. They say when you have enough layers of the dilutes on it won't change color from absorption any more. That is how you tell you are done.
How you do it is you pour your resin into your measure bowl, add whatever proportion of acetone into it then add enough hardener for the total amount. In the 4: 1 I added 35 drops of hardener just like i would have on a straight 5 ounces of resin. Add acetone to resin , stir to mix it up good, them add the appropriate amount of hardener and mix REALLY WELL. If you don't mix it good enough you will have a mess, Your cured project will have spots that are going to be tacky and you have to clean up the mess with acetone and redo those areas..
By the time I got done mixing the first batch it was a no brainer I was going to need more hardener. I called Bondo. Come to find out they are now owned by 3 M. ( so what else is new?) I asked the guy could I use the hardeners I can get locally with this water proof resin. Remember the stuff that was donated way back in the beginning? While there is NO WAY I would trust simply "water proof" on a rudder or any thing that is under the water line, this seem like a great application. Its water proof so it should not be negatively affected being in a boat.
The tech looked it up. As long as it is a BONDO OR 3 M LIQUID HARDENER or a MEK LIQUID Hardener I was good to go , so off I went down to Oreilly's to get some more. The tech made a BIG DEAL out of making absolutely sure I DID NOT get creme hardener. A small 1 point something ounce bottle was 6 dollars USD and some change. It broke seven dollars by the time tax was added.
insert photo of resin and hardeners here.
If you notice on the pic the edges look REALLY raged. That was my fault.

I have this old table I use that believe it or not was once a really expensive dining room set. I put some cheap plastic drop cloth over it and the plastic moved like a California earth quake. It was all over the place. That fringe is where the resin hardened/ cured to the plastic.
Some close up shots of the edge . It's a REALLY good thing polyester resin does not stick to plastic or I would be in big trouble.

As you can see in these pics, the resin got under the plastic. The formula I have got figured out OK. My technique needs serious improvement.

If I was trying to make a 3 d fiberglass seascape or a grass scape with little fingers of the glass pointing up one layer in front of another, I think the "do it on plastic" would do a great job.


The good news is except for needing to be sanded thinner to fit in the spot. I may have a perfect seal along the edges in most places except for the flat edge on the bottom .
Time to use the Dremel!!!!!!!
It started out with the platform under the porta pottie being in really UGLY condition. I took it out ( previous post) and put cloth and one straight coat of poly on the bottom side. It looks terrible. NO one but me is ever going to see it , so for a newbie project where I'm experimenting I think it will be OK. It not like it is going to be intentionally immersed. What was there originally only had paint on it so anything is an improvement.
include photo here of pottie support
Rearranging the flotation foam in the v berth and turning part of that space into storage meant taking the wood off of the V berth. I used the original wood to make my pattern . Again since I'm just learning this, I started with the under side of the tip of the wood.

All things considered, it does not look to terribly bad for a rank beginner. It has a spot that I honestly have no idea why but it points up like a pin. I have this notion that a bug flew onto it and left that point when it flew off. The poly must have been really close to dry since it is still here and the bug or what ever it was did not stick. You can't see any of the cloth in it except for a few spots around the edge so I think I must have done alright. Much better then not pre-coating it,. That has places all over you can see the weave of the cloth.
I diluted the poly down with acetone. I used a 4:1 mix, then a 2:1 mix then a 1.5: 1 mix. My hand slipped on the last one. Then I did the straight poly coat. They say when you have enough layers of the dilutes on it won't change color from absorption any more. That is how you tell you are done.
How you do it is you pour your resin into your measure bowl, add whatever proportion of acetone into it then add enough hardener for the total amount. In the 4: 1 I added 35 drops of hardener just like i would have on a straight 5 ounces of resin. Add acetone to resin , stir to mix it up good, them add the appropriate amount of hardener and mix REALLY WELL. If you don't mix it good enough you will have a mess, Your cured project will have spots that are going to be tacky and you have to clean up the mess with acetone and redo those areas..
By the time I got done mixing the first batch it was a no brainer I was going to need more hardener. I called Bondo. Come to find out they are now owned by 3 M. ( so what else is new?) I asked the guy could I use the hardeners I can get locally with this water proof resin. Remember the stuff that was donated way back in the beginning? While there is NO WAY I would trust simply "water proof" on a rudder or any thing that is under the water line, this seem like a great application. Its water proof so it should not be negatively affected being in a boat.
The tech looked it up. As long as it is a BONDO OR 3 M LIQUID HARDENER or a MEK LIQUID Hardener I was good to go , so off I went down to Oreilly's to get some more. The tech made a BIG DEAL out of making absolutely sure I DID NOT get creme hardener. A small 1 point something ounce bottle was 6 dollars USD and some change. It broke seven dollars by the time tax was added.
insert photo of resin and hardeners here.
If you notice on the pic the edges look REALLY raged. That was my fault.

I have this old table I use that believe it or not was once a really expensive dining room set. I put some cheap plastic drop cloth over it and the plastic moved like a California earth quake. It was all over the place. That fringe is where the resin hardened/ cured to the plastic.
Some close up shots of the edge . It's a REALLY good thing polyester resin does not stick to plastic or I would be in big trouble.

As you can see in these pics, the resin got under the plastic. The formula I have got figured out OK. My technique needs serious improvement.

If I was trying to make a 3 d fiberglass seascape or a grass scape with little fingers of the glass pointing up one layer in front of another, I think the "do it on plastic" would do a great job.


The good news is except for needing to be sanded thinner to fit in the spot. I may have a perfect seal along the edges in most places except for the flat edge on the bottom .
Time to use the Dremel!!!!!!!
Subscribe to:
Posts (Atom)