Search This Blog

Showing posts with label macgregor. Show all posts

Friday, July 12, 2013

Lost and Found


Funniest thing, when you all of a sudden have two computers to work with, remembering which one you downloaded pictures to can become a part of the learning curve.   These were on the net book. ( old system)


                                           Buddie in an extra small PFD. It fits perfectly.


 Saw this on the cabin sole. Any idea what kind of bug this is? Looks like a cockroach except it has spots.


On the more boring aspects of life, I have given up on fighting with the shocks, I decided to just go with the same brand of shocks that were in place. My mechanic is going to get them installed and I'm going to focus on things that do not make me stark raving insane, like  getting ready to blow this pop stand of a town and head for blue water. I'm not getting my hopes up BUT if all goes well, based on an earlier phone, call I may actually get out of here this month!  I will know more in about an hour or so.
Got the pics of the street pipe break flooding my yard. I'm so glad we were all here when it happened. At least it did not get to the foundation this time.


That's all for now, Sail safe but SAIL!


Saturday, July 7, 2012

FINALLY!!!! It's About BOATS!!!!!!!!!!!!!

While I am doing the hopefully FINAL sorting of the stuff in the house, I'm working on the Challenger as my sanity keeper. The Venture is still in the drive way but she is full of stuff I have yet to sort through before I put her up on blocks to drop the keel.  This is how I'm keeping my sanity in the mean while. Yeah I'm getting flack from some of the guys over the method and materials I'm using. By their standards and expectations,  I'm cheating like an erring husband on how I am doing this.  For this reason I make an open and honest offer to those who feel very strongly about how I should be using the two part epoxy on these little  fixes. Please feel free to shop and order the materials you think I should be  using and ship them to me. I will be more then happy to use them and even give you a blurp as donator.  Email me for my shipping address.

Having said that, on to the boat.  If you remember I picked this up last summer with the idea of fixing it up for  my son.  Well he is on his  own, several states away and I'm not about to carry it THAT far on the top of my car. I now have another toy to play with . You can tell I'm just heart broken over that development, right? :)~


Finally got her up on blocks to work on.


Sorry about he angle but had us use my cell phone and that aint gonna take a close shot  straight on.


Initial work to be done.


There are some gouges and dings along the keel. This one is the worse with out actually being a full fledged breach.


            Then there is this one which is a                     full blown hull breach.


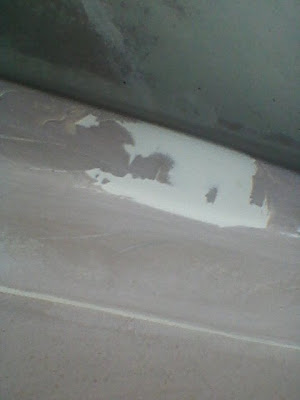
                         A close up of breach.


Then there is the transom. The story that goes with boat is it got hit by a string lawn mower TWICE.

    Been busy sanding her down. Wouldn't  you know the sander went kapluie. I have go to learn how to replace bushings in these sanders! I do however have a LOW COST idea on how I am going to temporarily solve that  little problem. All I have to do is go digging in the shed which is another spot every thing is stashed in for now. GRRRRR  I'll let you know how it turns out AFTER I try it.If it is successful. This idea is so nutty, I'm not telling in advance.

Now some of you guys are going to hate this but I've been using JB weld products for years quite successfully. I've saved TONS of money using their line. They make water weld and I got some.  So far  I have  2 1/2  tubes invested.  Beats what epoxy cost. Yes, I thought about getting some filler and using the polyester epoxy.  It cost 18.00 plus a can and I have ZERO experience using that kind of set up. Before I do it on a boat I actually hope to be in the water with THIS SUMMER or what is left of it, I went with the water weld.  It's about SAILING remember?


In no particular order here are the current pics.

This is where the sander died . GRRRRR

Almost partially done with the first sanding .


Remember that really nasty hull breach?


That's all for now.
Sail safe but SAIL!!!!!!!!

Horse of a different color

Well its been a while. I have been in the south. We had arranged to go work for a guy doing some "minor " repairs on his house. Nothing big. Refinish a floor, refinish his wrought iron, little stuff like that. He was wanting us down  there and as any on who has redone a boat knows things ALWAYS take longer to do then anticipated and doing this house as no exception. so between him and me, we decided to go ahead, use his tools, and get down there. I wanted to take  the Venture since the original idea was a place to work on it and get her in the water. Tires being  as high priced as they are we decided to leave her here. go ahead and go do the job to make money for all this other stuff.
Turns out the floor he wanted to refinish was in a room filled with things he really should have put in storage It would have taken three days to just to get that out of there.
Nothing was ready to work on. Spent the first couple of days sorting through his garage looking for tools. and changing lite bulbs. Then he wanted to gripe about it.
Its funny I told him flat out I was not up for anything that required a license yet he wanted me to do plumbing.  One thing led to another and he wanted  us to do major remodeling like replace his windows in the front of his house etc. Now all of that we could have  done. That was not the deal breaker.


The job allegedly came with a 28 ft RV.  The orignal agrement was he would provide hook ups for and we would purchase on payments for my son. W wold work out some sort of contribution fr the utilities.  Almost immediately he wanted me to rent a spot at an RV park, Now housing and 10.00 a man hour is not to bad but when he took away the housing 10.00 an hour aint  all that much when your paying motel bills or rv space plus hooks ups. the profit margin crashed on that one. Still that was nothe deal breaker.  The fact that he wanted get work that wold have easily cos him way more then 10.00 an hour done as cheap as possible I can understand.Yes, I still have all the emails about this.


The travel trailer has storm damage which was repairable we knew that up front. When we got there and tore into the damaged area to see how  extensive the wood frame damage was,  come to find out that trailer has BLACK MOLD in it.  I've done black mold twice.  Once for myself and once for a lady I did garden wort for as a personal favor. THAT STUFF CAN KILL YOU!  Not something I want to Tackle especially not for 10.00 an hour after he had already tried to rip me off on wages. Black mold or mold of any type is a dangerous thing!  It is HEAVILY regulated by state and federal law.
Long story short in between that and him trying to gip me out of wages it did not last.  The final straw that broke the camels back was his hidden agenda. He knew this was a TEMPORARY THING!  He is in my groups and knew , same as any one else does that MY GOAL IS BLUE WATER! NOT living in an land locked area ANY WHERE!  He came up while  we were working on the wrought iron and tells me his real goal was to use the travel trailer to see how we did on it with the idea m and his brother would take turns hiring us to do work in his brothers RV rebuild place and his house.  He was trying  to "help" his bother since he apparently has trouble keeping people hired.  IN THIS ECONOMY?  That told me right there all I wanted to know.  When he old me that I about dropped my jaw to the ground.   After we go done working I told him we needed to solve the housing problem He allegedly went blank on ideas. He started griping about how I had not brought the boat., which he agreed to before we left. I gather his idea was that we would live in he boat when we found out the black mold was s to bad to stay in the travel trailer. I guess he figured he wold have us by the short hair and in a bind. I told him we were gong to go eat and he should text me if he had an idea. Spending  the night in a COLD mountain area in my van with two dogs and packed to the roof  was not my idea of how I wanted to live. Did not have enough cash left since I had spent ever thing  to just get there to do his job, so we headed south. Sleeping in the van is one ting but freezing  our butts of while doing it is a different horse altogether.
Yeah, I should have called OSHA or NLRB. I have something much more effective in mind. I am  letting providence deal with him.  Momma always said, what you do will ALWAYS come back to you and I expect he is going to get to walk a long walk in our shoes, sooner or later.


The good news is my son found him a place in a very nice area and is now on his own.
Me? I'm back in Oklahoma getting things set to up to deal with house. Have an unexpected gliche but nothing that can't be solved, It is just going  to delay selling house a bit. If your a praying person, do me a favor and pray the problem gets resolved so I can get house sold.


In the mean  time I am working on tiny things to get house  ready to go and working on the 16 foot challenger.


Sail safe but sail.

Saturday, November 5, 2011

Global "warming" brings COLDER TEMPS?

What in the heck is going on with this weather? Last winter was a bone chiller.This last summer was like we were in death valley. In fact on many days it was hotter here then it was in Death Valley.I checked just to see. The first of June  was 105 degrees hot and it stayed that way  and hotter until all of a sudden in September it went to cool and now the first of November is is cold to the point of below freezing already. In  the over 20 years since I have lived here, this is NOT normal. This is more like upper Midwest not  South west!
 Now I'm fairly easy to get along with . I have learned to roil with the punches but this is ridiculous!
All the talk about global warming that I hear makes me wonder what the SAM heck is going on. How can we be having :global warming if the winters are slowly getting  COLDER?
This gal has had enough!

Monday, October 31, 2011

Polyester and Wood

All over the Internet I see people really putting down using polyester resin for different projects.  Now granted the expensive epoxy may be better, I would not know, I have never used it.  If I ever build my own wooden boat, Id probably use the 2 part epoxy just because it is supposed to be better wetting . What I do know is after a LOT of research I found something that I'm really happy with for the current application. 


It started out with the platform under the porta pottie being in really UGLY condition.  I took it out  ( previous post) and put  cloth and  one straight coat of  poly on the bottom side. It looks terrible.  NO one but me is ever going to see it , so for a newbie project where I'm experimenting I think it will be OK. It not like it is going to be intentionally immersed.  What was there originally only had paint on it so anything is an improvement.

  include photo here of pottie support

 
Rearranging the flotation foam in the v berth  and turning part of that space into storage meant taking  the wood off of the V berth.   I used the original wood to make my pattern . Again since I'm just learning this,  I started with the under side of the tip of the wood. 


All things considered, it does not look to terribly bad for a rank beginner.  It has a spot that  I honestly have no idea why but it points up like a pin. I have this notion that a bug flew onto  it and left that point when it flew off. The poly must have been really close to dry since it is still here and the bug or what ever it was did not stick. You can't see any of the cloth in it except for a few spots around the edge so I think I must have done alright.  Much better then not pre-coating it,. That has places all over you can see the weave of the cloth.


I diluted the poly down with acetone. I used a 4:1 mix, then a 2:1 mix then a 1.5: 1 mix. My hand slipped on the last one.  Then I did the straight poly coat. They say when you have enough layers of the dilutes  on it won't change color from absorption any more. That is how you tell you are done.
How you do it is you pour your resin into your measure bowl, add whatever proportion of acetone into it then add enough hardener for the total amount.  In the 4: 1 I added 35 drops of hardener just like i would have on a straight 5 ounces of resin. Add acetone to resin , stir to mix it up good, them add the appropriate amount of hardener and mix REALLY  WELL. If you don't mix it good enough you will  have a mess, Your cured project will have spots that are going to be tacky and you have to clean up the mess with acetone and redo those areas..  
 By the time I  got done mixing the first batch it was a no brainer I was going to need more hardener. I called Bondo. Come to find out they are now owned by 3 M. ( so what else is new?) I asked the guy could I use the hardeners I can get locally with this water proof resin. Remember the stuff that was donated way back in the beginning?  While there is NO WAY  I would  trust simply "water proof"  on a rudder or any thing that is under the water line, this seem like a great application. Its water proof so it should  not be negatively affected being in a boat. 
The tech looked it up. As long as it is a BONDO  OR 3 M LIQUID HARDENER or a MEK LIQUID Hardener I was good to go , so off I went down to Oreilly's to get some more.  The tech made a BIG DEAL out of making absolutely sure I DID NOT get creme hardener.  A small 1 point something ounce bottle was 6 dollars USD and some change.  It broke seven dollars by the time tax was added.


 insert photo of resin and hardeners here.

If you notice on the pic the edges look REALLY raged. That was my fault.


I have this old table I use that believe it or not was once a really expensive dining room set. I put some cheap plastic drop cloth over it and the plastic  moved like a California earth quake.  It was all over the place. That fringe is where the resin hardened/ cured  to  the plastic. 


Some close up shots of the edge . It's a REALLY good thing polyester resin does not stick to plastic or I would be in big trouble.


  As you can see in these pics, the resin got under the plastic.  The formula I have got figured out OK. My technique  needs serious improvement.


If I was trying to make a   3 d fiberglass seascape or a  grass scape with little fingers of the glass pointing up one layer in front of another, I think the "do it on plastic"  would do a great job.


The good news is except for needing to be sanded thinner to fit in the spot. I may have a perfect seal along the edges in most places except for the flat edge on the bottom . 


Time to use the Dremel!!!!!!!

Saturday, October 1, 2011

It is FINALLY About THE BOAT!!!!!!!!!!!!!!!!!

Original as delivered


Tore out wood, removed flotation foam. It was just big blocks of foam thrown any which way that had a LOT of empty space in between the chunks. I reinstalled it  more into one  solid block. Made an extra foot or so of storage room all the way across the aft end of the v berth. Yes, I used canned expanding foam to lock it into place. The experiment I did several months back says this particular brand of foam does not soak up water after several week in a glass of water on the sealed , non cut side. Since there are no cuts in the expanding foam and since this is a coastal cruiser at best and WILL NOT be out in blue water,  there should not be a problem. Since I have reinstalled all of the origami foam and and more, the flotation level should be greater. .


Good shot showing the new storage space I will have under the v berth. The thought occurs this would be a great place to put a couple of small water tanks


In no particular order here are a lot of the photos I've taken since she was delivered last winter. Sorry about possible duplicates from previous post.
.
definitely need to rebuild sink


Lots of sandiug left to do.  Under side of deck plate  hull area needs to be sanded and  painted. Lots of tiny spaces.  I am really glad I found a set of various sized sanding drums that should fit quite nicely.


I soo wish I could remember what that board goes to!!!!

Bow hatch still needs sanding, painting and two new hinges

The one spot that is actually done. Port around sink. as long as you don't look up past the shot, LOL. 


Original shot of inside
 

  Current inside as of 10/01/11


 Did I mention don't look UP?
Pop top is off and in the yard being sanded for repainting.


 Slow but sure she is starting to look better inside, one spot at at time.


Close up of  all the fun I am having getting into the tight spots to   sand. Port side window area.


Porta potti goes here. Talk about a tight fit, but you can actually sit down as long as your careful to make sure you have your self balanced.


The Pop Top

 It looks so much nicer from a distance.


 getting an orbital sander in the curves is no piece of cake but slowly she is getting done. Planning on getting as much as I can with the orbital then using drum sanders for big curves and corners to tight for orbital. Once that is done have the dremel  for really tight spots.. That Dremel is turning out to be the best tool investment I ever made.


 Trying to get some of these screws loose is a real headache, I'll get it done but I will sure be glad when this part is over,.About an hour or two of pushing that sander around  and I'm ready to call it a day.


I have no idea what the big bolt is to. They run along both sides of the pop top.,My thought is it is in place for handrails since nothing else makes sense. They are just there .Nothing is attached,. The two small holes above the bolt are where we had to take the poles that hold up the pop top out. Went to local stores trying to find a screw driver that big. It's not happening  locally. Ended up buying a very small wonder bar. Figure if nothing else I'll have one of the guys hold it tight while I pout a large socket wrench on  the nut side to break them loose.


Starboard bow wall


 Port bow wall


Sanding out stress cracks in gelcoat . Have 4 quarts of white Rustoleum marine paint at Ace Hardware I need to pick up. The sticker shock was not to bad. Only 17.00 a quart USD. Was cheaper then I expected considering the price of any thing remotely considered to be a specialty item around here puts it through the roof. No shipping charges since I had it delivered to the store. Cant say the same for the bottom paint though. Rustoleum makes a bottom paint .It comes in  Black or blue.,Trouble is I have to go to el reno store to get it.  DO not remember if it was Ace or the true value. Either way the customer service lady was really sweet and mentioned pettit does more colors. When I get time Ill check them out.


 Starboard area between head and v berth partially done.

That's all for now.  Next boat related focus as planned is me continuing to sand and paint  the pop top and interior of boat while the guys are finishing interior of house. Once we finish the big jobs still left to do on the house, it is all hands on deck so we can lift the boat to drop the  keel..